Canadian Snowbird: 1/48th Hobbycraft CT-114 Tutor
- Nov 5, 2022
- 4 min read
Updated: Jun 28, 2024
This is Hobbycraft's CT-114 (CL-41) Tutor, an aircraft familiar to many Canadians. If you have been to an airshow in Canada, chances are you have seen this 9-plane aerobatic team. Most model makers never thought we'd see in an injection molded kit of this subject though, especially in 1/48th. On the down-side, the kit is very basic, panel lines mediocre, and the glass canopy quite thick.

Notable Kit Features:
It's an injection molded 1/48th scale Tutor
It basically looks like a Tutor
Decent decals for the early team markings (1986 and prior)

Build Inspiration:
This is Canadair's Tutor aircraft, which started its career with the RCAF in the early 60s. Since then, Tutors have chalked up more than 1,000,000 flight hours and although replaced by other types as a trainer (around 2000), it is still in service. The CT-114 jet is flown by the Canadian Air Demonstration Squadron (431) "Snowbirds" since their inception in 1978. I have lost count of how many times I have seen the 9-plane formation team at airshows, so naturally, I always wanted one in The Hangar.

Heads-Up Report:
The kit provides little in the way of a Snowbird aircraft, missing the smoke generating system and proper size/shape tanks
Cockpit is very basic and requires some scratch building to bring it up to speed
Surface plastic needs a light sand
Panel lines are too wide and not particularly accurate
It would appear (to me) that the gear wheels are too thin
Kit has early style glass nose (I modified mine as my reference photos were all from later aircraft, only to realize it should actually have the early style as provided by the kit - details details:)
Canopy glass is quite thick and somewhat distorted
Missing vertical tail antennas (on both sides)
Decals are not provided for the more current "Snowbirds" scheme

Kit Additions / Modifications:
Added cockpit details such as structure behind pilots, and the "quilted" sides and back (built from scored styrene sheet)
Added details to the ejection seats - panel with drill-outs (should have been 3 holes), red seat cushions, seatbelts and harnesses
Rebuilt trim tabs housing & rods on control surfaces
Reworked shape of canopy anti-icing jets in front of windscreen
Added small air scoops forward of canopy
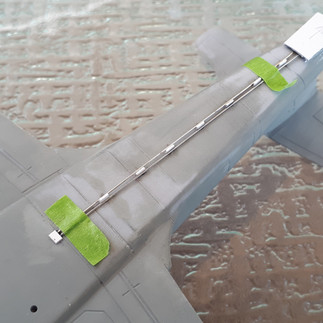
Scratch-built VHF antennas were added to tail made of thin styrene & wire
The oil pipes and supports as well as the rear fairing were scratch-built and added to the underside of the fuselage
A replacement canopy would have been nice, (and I noticed that I missed adding the rearview mirrors)


End Result:
The paint scheme for this aircraft requires you to be on your marks with the masking. The underside white diamonds and bird pattern were painted and masked off (as opposed to using decals) I had a problem with the red paint finish turning as rough as fine sandpaper on me. Compounding this problem, I was too hasty and applied the gloss finish over the rough red. Once I discovered the mess of the paint I now had a hard over coat which would make it much more difficult to recover from. Typically, this sandpaper or pebble finish is caused by the paint drying too much before it hits the model. Most likely from spraying from too far away from the subject kit and using higher than ideal pressure. Using Isopropyl alcohol thinner can also cause this paint problem (although it wasn't used in my case). Leading edges on the wings were painted aluminum with the top part of the landing lights painted over.

I should post a sign in the spray booth "Close in and ease up on the pressure". Much work was done sanding the surface down afterwards, however it was a challenge and never quite fully corrected due to my overwhelming desire to move along the project. (Adding to the penalty, there were a group of four aircraft involved in this red paint fiasco (Go Big or Go Home mentality). All subjects had some level of disaster occur... sometimes we model makers rush things, and later regret the results. "Live and Learn"... and sometimes "Live and Repeat Same Mistake" because you are moving too fast to get to the finish line.

The After-Build Report:
if you want a Tutor in your 1/48th collection, this is the best starting point. Despite all my criticisms my biggest regret is not buying two, or more, at the time. The kits were inexpensive, but I knew about the issues, so I held back. Now these and the Hobbycraft CF-105 kits are highly sought after (mostly by Canadian builders) and expensive if you do find one.
If I had a do-over I would probably fill in the panel lines on the model as a start-point and add a piece of plastic card to thicken the wheels a bit... still looking for the proper tanks to fit this aircraft with, however for all who view, (and don't get too close) it looks like I have a pretty decent Snowbird in the collection.

Feel free to comment or ask any questions - Keep on building, gain experience, challenge yourself if you like, but try not to stress yourself out over the build - it is supposed to be an enjoyable hobby after all - Cheers


Comments