Wespen Zerstörer: 1/48th Revell Bf 110G-2
- Oct 30, 2021
- 4 min read
Updated: Jan 5, 2025
This is the 1999 1/48th Revell Bf 110G-2 model, based on the earlier G-4 kit released in 1994 under the Pro Modeler brand. It can be built up into a nice looking Zerstörer, however it is not without some effort and / or extras. (The same molds were used by Hasegawa in their late 90's Bf 110 releases.) The G-4 and G-2 were later re-released around 2013 by Revell.
Notable Kit Features:
Nicely detailed cockpits
Multi-piece cockpit glass with hatches that can be positioned open
Finely engraved panel lines
Resin nose and nose guns
Weighted tires
Build Inspiration:
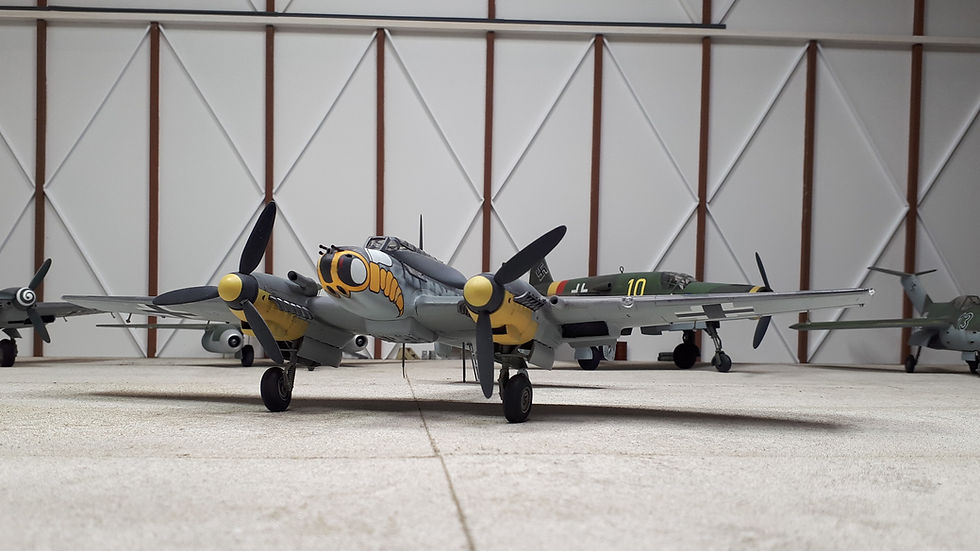
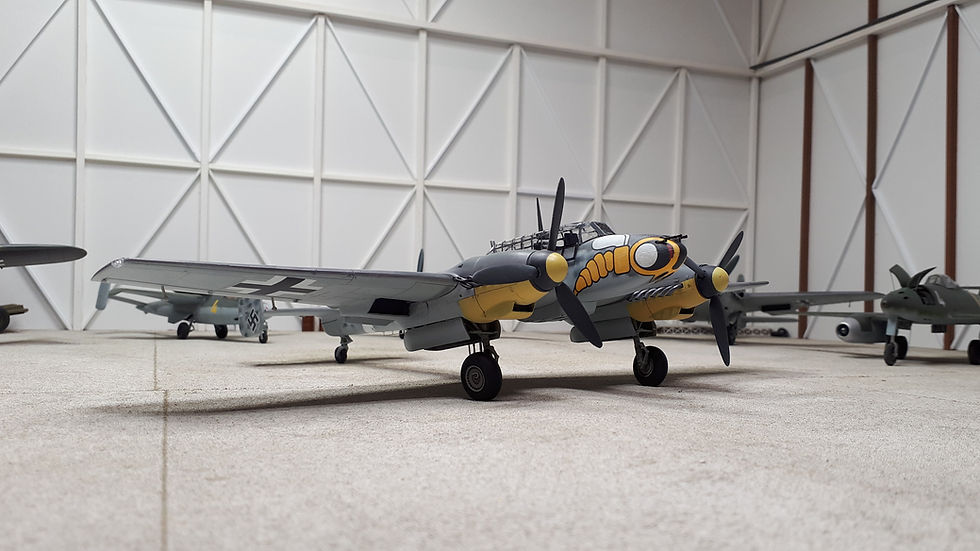
I built my first Bf 110 back in 1992 using the markings of Gruppe II./ZG 76 'Haifisch' (Shark) and had debated at that time using the ZG1 Wespen (Wasp) markings. When I came upon this kit at my local hobby store on sale for only $20, I figured it was a good time to ante in for the second Zerstörer build. The wasp nose markings and squadron yellow engine nacelles and spinners made this aircraft a "must have" for my model aircraft collection.

Heads-Up Report:
At first glance this 1/48th scale Revell model looked like a nice kit with fine recessed panel lines and good details, so I bought the G-4 a little while later when I saw it on sale as well. Getting into this build, I discovered a few issues that would cause some concern for some, and may be a show stopper for others.
Warped and twisted fuselage (in my example)
Flash issues on many parts
Resin nose provided which will necessitate removal of kit nose portion and dealing with the preparation of resin parts (Cutting off main block and sanding - Remember to always wear protective mask and gloves and hold off any food or drink by the bench at this stage)
Nose fit mating between resin and kit plastic requires quite a bit of sanding to smooth out the join
Engine to wing fit is not great (and the engines aren't quite the correct shape)
Spinner shape and detail is not correct (I left mine be however the Cutting Edge Bf 110F/G Correction will address a few of these issues if you can find / afford one*)
Noticeable gap on the interior between the radiator covers and the radiators
Wingtips fit required quite a bit of sanding and filler
No kit provision for underside antenna material (this is a DIY part)
Tail shape appears to be "F" model (should have broader chord and larger trim tab)
* Cutting Edge's CEC48416 Bf 110F/G Correction Set addresses the issues of the engine nacelles, the wing "humps" right back to the flaps, the spinners and the propeller blades. Two different styles of oil coolers are supplied as separate parts. The cooling scoops on the upper wing bulge are also provided as separate parts.

Kit Additions / Modifications:
Made crew seatbelts from painted masking tape
The engine top area could use some additional build-up to better represent the shape of the engines (I did not bother with this modification)
The propeller spinners are undersize for this type (The Bf 110G used the same propeller hubs as the Bf 109G, which is larger than the kit's and has a center hole) - Again I did not bother with this modification
Added styrene sheet to fill gap in interior between the radiator covers and the radiators
Added wire antennas

Finishing:
After cleaning up the flash and assembling the kit, it was time for the paint-shop stage. I painted the white tail band, as I find that usually works better than the decal. The base underside (RLM 76) as well as upper splinter pattern in (RLM 74/75) was established using a standard masking tape process. The paint mottle scheme on the sides was carefully applied using a fine tip airbrush setup, properly thinned paint at low air pressure (you have to experiment to see what ratios work best for your airbrush). RLM 74/75 were used in the mottle in this example. The first shot was a bit of a rookie looking mottle, so I decided to fine sand that off, respray the 76 base and have another go. Second time around I was pleased enough with the results and continued on. Minor touch-ups were made with RLM 76 on areas as required. Kit decals were used to complete the markings. The squadron hornet decal on the nose required much decal setting solution, cuts in the decal film, to better allow the curved fit as well as some final paint touch-ups to blend everything together.

The After-Build Report:
Despite the problems with this kit I was happy with the way it turned out. True, it is not overly accurate for the specific type and it did require some additional work to improve the look however, if you are looking for a budget build, this kit may meet your needs. The newer Eduard kits are superior in about every aspect, however they are not easy builds by any means and the kits are much more expensive (however do produce impressive results). If you are looking for an earlier type in 1/48, Eduard as well as Cyber-Hobby/Dragon/Wing Tech, have kits which look very promising as well.
Feel free to comment or ask any questions - Keep on building, gain experience, challenge yourself if you like, but try not to stress yourself out over the build - it is suppose to be an enjoyable hobby after all - Cheers


Comments